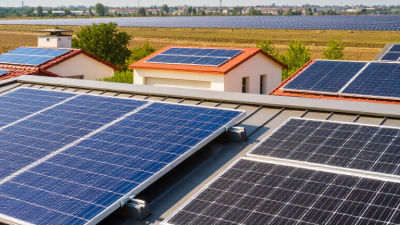
Choosing solar can feel straightforward until the quotes arrive. One installer may recommend a compact system, while another proposes more panels and a larger inverter. Both might sound convincing. The right choice depends on your roof, electricity use, budget, and plans for the property—not just the advertised panel efficiency. A shaded roof, for example, can change the value of a system that looks excellent on paper.
This guide introduces seven practical ways to compare solar panel solutions. It covers panel performance, equipment compatibility, installation quality, warranties, and the details behind a savings estimate. Check how each proposal handles roof orientation, local shade, and seasonal electricity use. Ask what the quoted price includes, such as permits, monitoring, and any electrical upgrades. Small omissions matter. A battery can be useful, but it is not automatically necessary; its value depends on your needs and local utility arrangements. Compare written estimates and verify installer experience, insurance, and relevant credentials. Ask for references when available.
Payback figures deserve a careful look. They rely on assumptions about energy prices, system output, maintenance, and incentives, which may change over time. No estimate can remove all uncertainty. That is worth remembering. The best decision is not always the cheapest quote or the most powerful system. It is the option whose benefits, limitations, and costs you can clearly understand before signing.
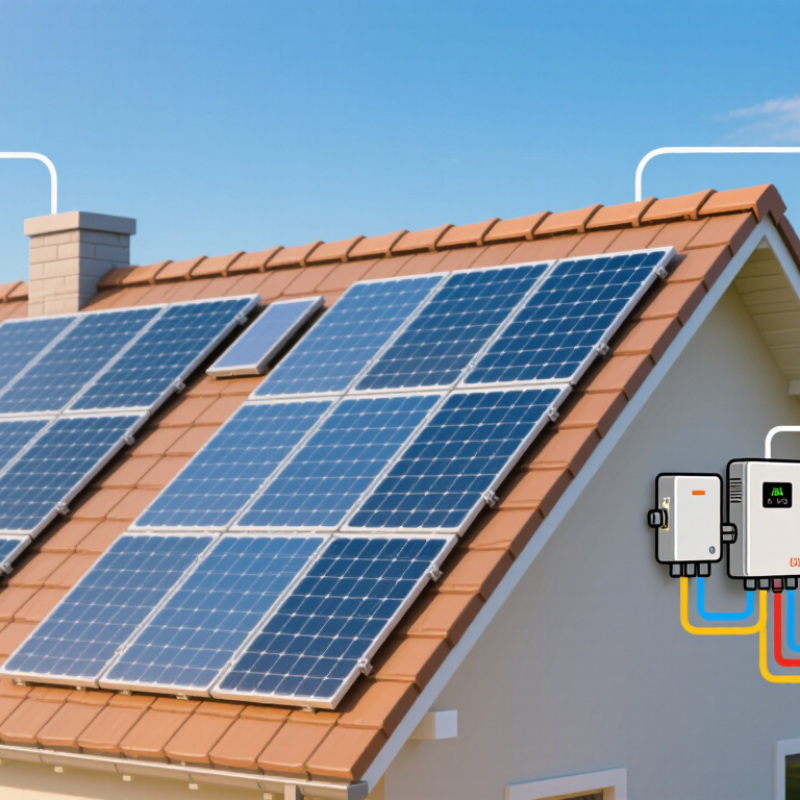
Before comparing solar options, map twelve months of electricity use from your utility bills, not just one sunny-season bill. The U.S. Energy Information Administration reported average residential electricity consumption of about 10,791 kilowatt-hours per customer in 2022. That is a useful reference, not a household target. Check your own annual total, peak-season bills, and planned additions such as an electric vehicle or heat pump. Small details matter. A home that uses most power after sunset may need a different system design than one with daytime demand.
Then measure usable roof area, orientation, pitch, and shade at different hours. A chimney shadow can reduce the value of an otherwise generous roof. Note vents, skylights, and space needed for safe access; raw roof area is not all panel area. NREL’s 2016 rooftop solar assessment estimated 1,118 gigawatts of capacity across U.S. rooftops, but that national figure does not mean every roof is suitable. Ask an installer to model your address, local weather, and shading, and compare the estimate with your bills. Estimates can miss things. Trees grow, and household habits change. Check whether a ground-mounted system is feasible if the roof is crowded.
When comparing solar panels, start with the space available on your roof. Monocrystalline panels usually produce more power per square metre, which can help when roof area is limited. Polycrystalline panels may suit larger, less restricted roofs, while thin-film options are lightweight and flexible but often need more surface area. The trade-off is real. Efficiency describes how much sunlight a panel converts into electricity; it does not predict your bill on its own. A high-efficiency panel may still be a poor fit if its output, cost, or installation requirements do not match your home.
Read performance ratings alongside efficiency. Standard test-condition ratings make panels easier to compare, but they do not represent every rooftop’s daily weather. Check the temperature coefficient: output typically falls as panels heat up, so this rating matters on hot roofs. Also compare expected degradation and the terms behind performance warranties. A rating printed on a datasheet is useful, but shading from a chimney or a nearby tree can change real output. Look at the installer’s site-specific estimate, including roof direction and local climate. One detail is easy to miss: estimates can feel precise while still relying on assumptions. Ask which assumptions were used, and compare more than one panel type.
Choosing a solar system starts with the sunlight your roof actually receives, not the number of sunny days in a brochure. The World Bank and ESMAP’s Global Solar Atlas maps long-term solar resource by location, offering a useful starting point for comparing sites. But a regional average cannot show shade from your maple tree at 4 p.m. Check the roof through different seasons, and note its direction, pitch, and nearby obstructions. Small details matter.
Climate changes the decision, too. Hot roofs can reduce panel output, while snow, dust, humidity, and strong winds affect performance and maintenance needs. A clear-day inspection can mislead. Look for recurring shade from chimneys, branches, or neighboring buildings, and ask an installer to model its effect rather than guess. NREL’s 2012 review, Photovoltaic Degradation Rates, found a median degradation rate of about 0.5% per year across nearly 2,000 reported rates. That is a broad benchmark, not a promise for every site or climate.
Check system compatibility before choosing equipment. Roof orientation and shading affect expected production; inverter voltage and current limits must match the panel array. If adding a battery, confirm that the system can manage charging and backup loads. NREL’s PVWatts tool estimates production using location, tilt, azimuth, and system losses. Compare its estimate with a site-specific assessment. The model is useful, but not perfect. Ask which assumptions drive the result, especially shade and temperature.
| Tip | What to Evaluate | Practical Check | Why It Matters |
|---|---|---|---|
| 1. Assess available sunlight | Estimate local solar production using your location, roof orientation, roof pitch, and monthly weather patterns. | Request an annual energy-yield estimate based on local solar irradiance data. In the Northern Hemisphere, south-facing roof areas often receive strong annual sunlight, but east- and west-facing areas can also be suitable. | Solar output depends on sunlight reaching the panels throughout the year, not simply on the number of sunny days. |
| 2. Account for climate and temperature | Consider seasonal temperatures, snow, wind, rainfall, humidity, and local weather extremes. | Check the panel’s published operating-temperature range and temperature coefficient. Many crystalline-silicon panels lose some power as cell temperature rises; snow coverage can temporarily reduce production. | Climate affects both energy output and the equipment’s exposure to environmental conditions over its service life. |
| 3. Identify shade throughout the day | Look for shade from trees, chimneys, roof structures, nearby buildings, and future vegetation growth. | Review shading at different times of day and seasons. Ask for a site-specific shade analysis and an explanation of how the proposed module-level electronics or string layout handles partial shade. | Shade on part of an array can reduce production, with the impact depending on system design and how the shaded modules are connected. |
| 4. Check roof condition and usable area | Review roof age, structural condition, orientation, pitch, obstructions, and the area available for panels. | Have the roof and mounting plan assessed before installation. If major roof work is likely soon, compare the cost and disruption of completing it before the solar system is installed. | A suitable roof helps support a safe installation and can reduce the likelihood of removing and reinstalling the array for later repairs. |
| 5. Confirm system compatibility | Check that panel electrical characteristics match the inverter, optimizers if used, wiring, and any planned battery system. | Ask for the design to show voltage and current checks, inverter capacity, system limits, and compatibility documentation for all major components. | Compatible components help the system operate within its design limits and avoid connection or performance problems. |
| 6. Match system size to energy use | Use recent electricity bills, changes in household use, and local utility rules to estimate the appropriate system size. | Compare projected annual production with annual consumption, and check how export credits, time-of-use rates, and any fixed utility charges affect the estimate. | A system’s financial value depends on when electricity is produced and used, as well as on how the utility compensates exported energy. |
| 7. Evaluate storage, warranties, and service | Decide whether backup power or shifting solar energy to evening use is important, and review equipment and workmanship coverage. | For a battery, check usable capacity, power output, backup circuits, operating limits, and compatibility. Compare written product, performance, and installation warranties, plus monitoring and maintenance arrangements. | Storage can add cost and does not automatically provide whole-home backup. Clear coverage and service terms help set realistic expectations for long-term ownership. |
When comparing solar proposals, look beyond the headline price. Check the quoted system size, expected output, inverter costs, and installation work. Ask whether roof repairs, electrical upgrades, permits, or monitoring are included. Small omissions can change the real cost. A lower quote may not be the better value.
Incentives can reduce upfront expenses, but eligibility and timing depend on your location and current program rules. Verify details with an official government source or qualified tax professional before adding them to your budget. Get each estimate in writing. Compare cash prices with loan offers, including interest, fees, payment schedules, and early-payment conditions. Financing can make installation manageable, yet increase the total cost.
Estimate long-term savings using your electricity bills, utility rates, and household use. Ask how projections account for seasonal production, shading, panel degradation, and possible maintenance. A sunny roof helps, but it is not a guarantee. Keep a copy of the assumptions. It is tempting to focus on monthly payments; the total cost may tell a less comfortable story. Even careful forecasts can miss.
A solar proposal can look convincing on a tablet, but the installer’s credentials deserve a closer look. Ask who will design the system and who will do the roof work. Confirm that the company holds the required credentials in your area and carries appropriate insurance. Ask for recent customer references, then ask what happened when a project ran late or needed a repair. Get it in writing. A quick call can reveal more than a row of polished reviews.
Read the warranty documents before signing. Panel and inverter coverage may come from their manufacturers, while workmanship coverage depends on the installer’s written terms. Check what is covered, for how long, and who handles a claim if the installer is no longer available. Ask whether roof penetrations, wiring, and monitoring equipment are included. Small details matter. Find out how quickly the support team responds, whether service visits cost extra, and how you can reach them after installation. Keep copies of the proposal, permits, warranties, and system layout in one folder. I would not assume every promise made during a sales meeting will appear in the final contract; that is an easy detail to miss.