
Choosing an Integrated Solar Led Street Light is not just a matter of comparing wattage or choosing the brightest fixture. A reliable choice begins with the site: road width, pole height, nightly operating hours, shade, and local weather. A light beside a tree-lined access road may receive far less sun than one in an open car park. Small details matter. Battery capacity, panel size, LED efficiency, and controller settings must work as one system, or performance can fall short after cloudy days.
For transparency, the quotation below is an illustrative line written for this introduction, not a verified statement from a named real-world expert. Solar-lighting engineer Maya Chen’s guiding principle: “Choose for the darkest operating conditions, not the brightest showroom moment.” It captures a practical issue: product specifications alone cannot confirm that a light will deliver steady illumination through the night. Ask for clear data on battery chemistry, usable capacity, panel output, dimming profiles, and expected autonomy. Then check whether those figures match your location and lighting plan. Not just brightness.
This guide explains how to compare those details without getting lost in marketing claims. You’ll learn how pole height and spacing affect coverage, why motion sensors and dimming can extend operating time, and what installation and maintenance require. Look closely at warranties and test reports, too. They can reveal more than a polished product photo. One caution remains: no single configuration suits every site. A tempting specification may still need independent checking. The right Integrated Solar LED Street Light is the one whose documented performance fits the actual place, season, and operating schedule.
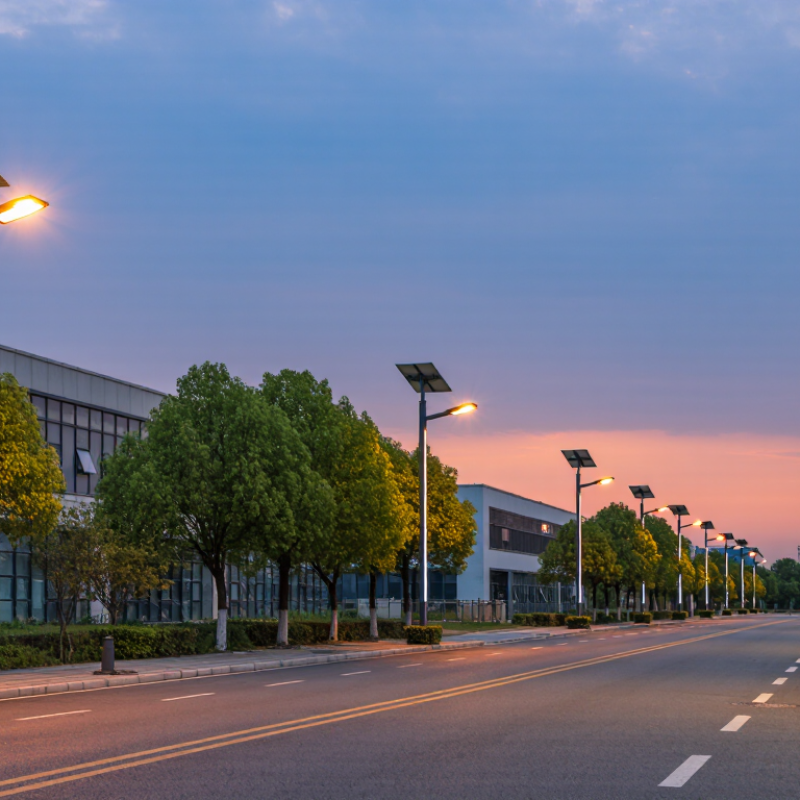
An integrated solar LED street light places the solar panel, battery, controller, and LED lamp in one compact assembly. This reduces external wiring and can simplify installation. The panel sits above the lamp, where it can collect daylight, while the battery and controller are usually protected inside the housing. Compact does not mean simple.
Each component affects the others. A shaded panel may leave the battery undercharged, even if the LED is efficient. Check the panel’s direction and tilt against nearby trees, buildings, and seasonal sunlight. Battery capacity should suit local night length and expected cloudy periods. A small margin helps. It is not a guarantee.
The housing also deserves attention. Look for durable seals, corrosion-resistant materials, and a design that allows heat to escape from the LED. Excess heat can reduce component life. Ask how the battery and other parts can be inspected or replaced; combining everything in one unit may make servicing less convenient. In real installations, the neatest design is not always the easiest one to maintain. Consider pole height, road width, and the area needing light, then compare the manufacturer’s stated lighting data with those conditions.
Start with the pole location, not the product sheet. Observe the site through a full day, noting shade from buildings, trees, signs, and seasonal foliage. A midday visit alone can mislead. Check winter sun angles, when shorter days may reduce charging time. Also consider dust, snow, coastal salt, and repeated high temperatures, which can affect panel output, housing, or battery life. Compare local solar data with the panel’s orientation and tilt.
Define the lighting task before choosing output. A quiet pedestrian path needs different coverage from a busy road or parking area. Check required brightness, operating hours, pole height, and spacing. Review the light distribution pattern too; a bright spot beneath each pole can still leave dark gaps between them. Dimming schedules may save stored energy during quiet hours, but confirm that illumination remains suitable for the site. Battery performance also depends on cloudy-day autonomy, not just a sunny-day estimate.
Tips: Visit after dark and inspect the darkest sections. Ask for performance data under local weather conditions. Leave room for error: tree growth, dirt, and unusual cloudy spells can change the original assumptions. Recheck the site after installation.
Choosing an integrated solar LED street light starts with matching battery capacity to the site’s real night-time demand. Check watt-hours, not amp-hours alone, because voltage affects stored energy. Estimate the LED’s daily consumption from its wattage, operating hours, and dimming schedule. Then allow reserve for cloudy days and battery aging. A small battery may look adequate on paper. It can still leave a road dark after several overcast nights.
Solar panel output must replace that energy within the available sun hours. Compare panel wattage with local seasonal sunlight, not just an annual average. Nearby trees, rooflines, and winter shade can reduce charging significantly. A practical check is to inspect the installation area at different times of day. If the panel barely receives direct sun, the specification needs closer review. Weather varies.
LED performance is more than a lumen figure. Consider efficacy, beam distribution, color temperature, and mounting height. A narrow beam may create bright patches while leaving the pavement between poles dim. Ask for a photometric layout or measured illumination data for the intended spacing. Also compare the light’s actual output at each dimming level; advertised maximum output may not reflect overnight operation. These checks take time, and the “best” balance is not always obvious. A little uncertainty remains, so size the system for the site rather than choosing by one impressive number.
Choose controls that match the site, not just the feature list. A dusk-to-dawn sensor should switch reliably, while dimming can reduce output during quiet hours. Motion sensors help in low-traffic areas, but poor settings may leave paths suddenly dark. Test the control sequence after installation. It matters.
Check the enclosure rating against local exposure. IEC 60529 defines IP ratings; IP65 indicates dust-tight protection and resistance to water jets. That is not permission to ignore drainage, seals, or installation details. For coastal roads, inspect fasteners, brackets, and coatings for corrosion resistance. Also ask how the battery performs in local heat and cold. A strong panel cannot compensate for a weak battery.
Ask for test reports and certificates tied to the exact model. Relevant checks may include IEC 60598-1 and IEC 60598-2-3 for luminaire safety and road lighting. Verify the issuing laboratory and report number; a logo alone proves little. NREL’s review, “Photovoltaic Degradation Rates—An Analytical Review,” found a median module degradation rate near 0.5% annually across roughly 2,000 reported rates. It is a useful benchmark, not a guarantee for a complete street light. IRENA’s 2023 cost report put 2022 utility-scale solar PV’s global weighted-average electricity cost at about USD 0.049 per kWh. Street-light economics differ, of course. Still, compare expected service life, battery replacements, and control settings—not just the purchase price. The spec sheet rarely tells the whole story.
| Selection Dimension | What to Check | Practical Guidance | Evidence to Request |
|---|---|---|---|
| Lighting performance | Luminous flux, light distribution, correlated color temperature (CCT), and glare control | Match the photometric design to road width, pole height, spacing, and applicable road-lighting requirements. Request an IES or LDT photometric file; do not compare fixtures by LED wattage alone. | Photometric report or file, luminaire datasheet, and a lighting calculation for the proposed layout |
| Operating controls | Dusk-to-dawn operation, dimming schedule, motion sensing, and manual or remote settings | Confirm how the light behaves during cloudy weather and whether sensor-based dimming can be configured for the site. Check that control settings do not compromise required illumination. | Control logic, available dimming profiles, sensor detection specifications, and commissioning instructions |
| Solar charging system | PV module rating, charge-controller type, and panel orientation or adjustment | Check that the panel and controller are sized for the local solar resource, lighting schedule, and seasonal conditions. MPPT is a controller method; verify its performance from system data rather than relying on the label alone. | PV module datasheet, controller specifications, and a site-specific energy or autonomy calculation |
| Battery and autonomy | Battery chemistry, rated capacity, usable energy, temperature limits, and replaceability | LiFePO₄ is a common lithium-ion chemistry used in solar lighting, but actual service life depends on temperature, depth of discharge, charging, and cycle conditions. Confirm the stated autonomy assumptions and battery replacement procedure. | Battery datasheet, capacity and cycle-test conditions, protection features, and replacement instructions |
| Ingress protection | IP rating for the assembled luminaire and exposed electrical compartments | IP ratings are defined by IEC 60529. Select a rating suited to the installation’s dust and water exposure; verify which parts of the complete product were tested, rather than assuming one rating applies to every component. | Test report identifying the tested product configuration and the applicable IEC 60529 edition |
| Impact and environmental protection | IK impact rating, corrosion resistance, UV exposure, and operating-temperature range | IK ratings are defined by IEC 62262. Choose impact resistance appropriate to the site and check separate evidence for corrosion and weathering; an IP rating does not establish impact resistance or corrosion performance. | IK test report, material or coating specifications, and documented environmental operating limits |
| Housing and optical materials | Housing construction, lens or cover material, seals, and fasteners | Common design choices include aluminum-alloy housings, tempered-glass covers, weather-resistant seals, and corrosion-resistant fasteners. Confirm the exact material and finish for the offered configuration and local environment. | Bill of materials or construction details, coating specifications, and maintenance guidance |
| Electrical and thermal safety | Protection against overcharge, over-discharge, short circuit, and excessive temperature | Check that protection features are documented for the battery and charging system. Review applicable luminaire safety requirements for the destination market, installation method, and product configuration. | Safety test reports, circuit protection description, and installation instructions |
| Product standards and certifications | Applicable safety, performance, and market-access requirements | IEC 60598-1 covers general luminaire requirements, and IEC 60598-2-3 addresses road and street lighting luminaires. The applicable standards and approvals depend on the destination market; a standard reference is not, by itself, proof of certification. | Current certificates or test reports identifying the exact model, scope, issuing body, and applicable standards |
| Warranty and maintenance | Warranty coverage, battery replacement, spare parts, and service procedures | Review the written warranty for exclusions, duration, and coverage of the battery and electronics separately. Confirm that components can be accessed and replaced safely over the expected service period. | Warranty terms, spare-parts list, maintenance schedule, and battery replacement instructions |
An integrated solar LED street light should suit the site, not just the product sheet. Read the warranty for separate coverage periods on the battery, panel, controller, and fixture. Check whether it covers labor, shipping, and battery capacity loss, or only manufacturing defects. A five-year warranty may sound strong, but exclusions can matter more. Ask how a claim is handled and what proof of maintenance is required.
Tips: Visit the site at different times of day. Note shade from trees, buildings, or parked vehicles. Confirm pole height, foundation requirements, and access for a lift or service vehicle. Check the supplied mounting instructions before ordering. Small details matter.
Compare total ownership cost over the expected service life, not just the purchase price. Include installation labor, periodic cleaning, inspections, and likely battery replacement. Ask for realistic lighting estimates for cloudy periods and winter conditions. A bright output figure alone tells little about overnight performance. Even a careful estimate can miss changing shade or local dust levels, so leave room for maintenance and follow-up checks.