What Is the Best Body Kit Audi A3 8P in 2026?
Choosing the best Body Kit Audi A3 8p in 2026 is not only about aggressive styling. It is about fitment, material quality, driving comfort, and long-term value. An A3 8P with sharp side skirts and a clean front bumper can look remarkably modern. Poor alignment, however, quickly exposes a cheap kit.
This guide compares popular body kit styles through practical ownership concerns. It considers ABS plastic, fiberglass, polyurethane, and carbon-fiber components. Each material behaves differently around parking barriers, winter roads, and hot sunlight. Real-world fitment matters more than impressive product images. A few millimeters can affect bonnet lines, wheel clearance, and headlight washers.
The discussion also examines installation quality, paint preparation, hardware, and supplier support. Experienced installers often spend more time correcting panels than fitting them. That detail is easy to overlook. Reliable manufacturers should provide clear measurements, vehicle compatibility, and replacement support. Independent owner feedback can reveal problems hidden by polished advertising.
There is no universal winner. The best choice depends on whether your Audi is a daily commuter, weekend project, or show-focused build. Local inspection rules and insurance requirements also deserve attention before ordering. This guide avoids exaggerated promises and weighs useful evidence instead. Some recommendations may remain debatable, because aftermarket quality changes between suppliers and production batches. Check everything carefully.
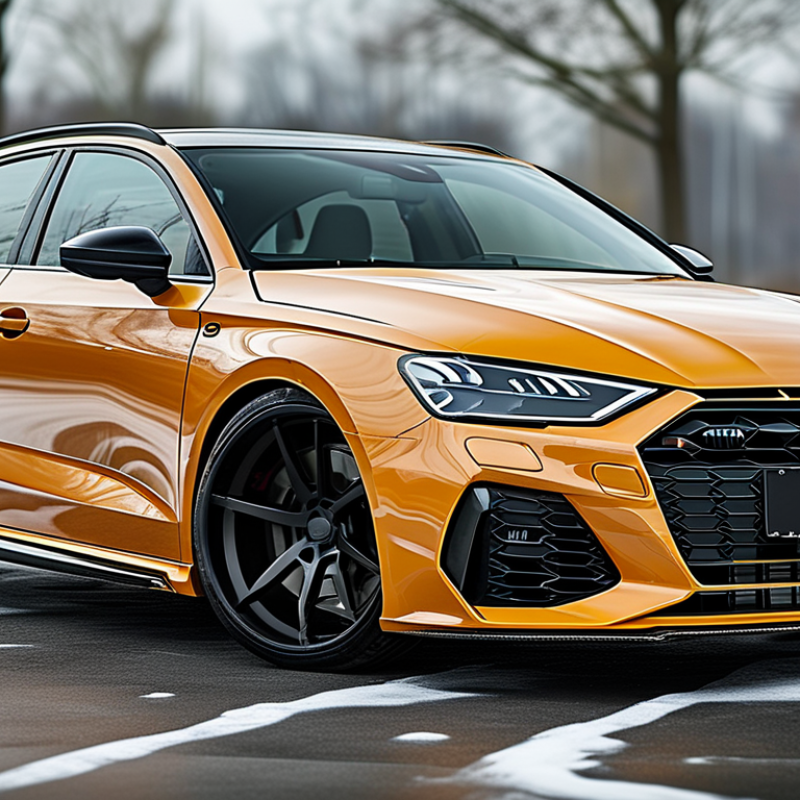
Audi A3 8P Body Kit Compatibility and Fitment Basics
Choosing the best body kit for an A3 8P starts with compatibility, not appearance. The platform includes three-door and Sportback versions, with different bumper lengths and mounting points. Facelift and pre-facelift parts may also use different grilles, lamps, and brackets. Fitment comes first.
Measure twice. Do not guess. Check the kit’s listed chassis code, production year, and body style before ordering. Compare your original bumper with the replacement, especially around wheel arches, fog-light openings, and undertray mounts. A careful dry-fit can reveal gaps before paint is applied. In my experience, a two-millimetre mismatch can become obvious under bright workshop lighting. Fiberglass panels may need more adjustment, while molded plastic usually offers more predictable alignment. Neither option is automatically perfect.
Tips: Remove the original bumper carefully and photograph each bracket. Test the kit with the bonnet, headlights, grille, and wheels installed. Check tyre clearance during full steering lock. Leave final sanding and paint until every panel sits correctly. Confirm that parking sensors, washers, and cooling ducts remain usable. I once underestimated the importance of the lower splash shield; the bumper looked right, but airflow and fastening points were wrong. That mistake changed my view of “easy” installation. A qualified body technician should inspect the finished fitment, because panel tension can increase after several heat cycles.
What Is the Best Body Kit Audi A3 8P in 2026? — Compatibility and Fitment Basics
This chart shows the documented production periods of the main A3 8P body styles. A body kit should match the exact body style first: three-door, Sportback five-door, or Cabriolet. Shared platform dimensions do not guarantee interchangeable bumpers, side skirts, grilles, bonnet panels, or mounting points. Always confirm facelift version, parking-sensor openings, headlamp shape, exhaust position, and wheel-arch design before ordering.
Key Design Styles for Audi A3 8P Body Kits
The best A3 8P body kit depends on the design language you want. From workshop experience, clean OEM-style kits remain the safest choice for daily driving. They use restrained side skirts, a deeper front lip, and a modest rear diffuser. The shape looks factory-inspired without making the car appear heavy. Smooth surfaces also highlight the original body lines and reduce fitting problems.
For a stronger appearance, consider an aggressive motorsport style. Wider arches, sharper vents, and a lower front bumper create a more planted stance. However, excessive openings can look artificial on a standard-height car. A minimalist style works well with darker wheels and subtle paint contrast. A retro-inspired design can add character through rounded edges and simple panels. It is less common, but that can be its strength. I once preferred the most dramatic option, though daily clearance changed my mind.
Tips: Check panel gaps before painting. Test the kit with the wheels installed. Measure ground clearance on ramps, not only flat pavement. Use flexible mounting points where possible. Avoid blocking parking sensors or cooling airflow. A professional installer should inspect the bumper structure, fasteners, and road visibility. Even a beautiful kit may need adjustment, and that is normal.
Best Body Kit Materials, Components, and Build Quality
What Is the Best Body Kit Audi A3 8P in 2026?
For the Audi A3 8P, material choice affects fitment, weight, and long-term durability. Polyurethane offers useful flexibility for front lips and side skirts. It can absorb small impacts without cracking immediately. ABS plastic gives cleaner, more consistent edges and usually needs less preparation. Fiberglass remains popular because it is affordable and easy to reshape. However, it may crack around mounting points after repeated road vibration.
In my workshop experience, the best body kits arrive with even panel thickness, reinforced brackets, and accurately drilled mounting areas. Test-fitting every panel before painting is essential. Check the door gaps, wheel-arch alignment, bumper support, and clearance near the exhaust. A kit can look impressive online but feel disappointing beside the car. I once accepted a small gap near a headlamp, assuming adjustment would fix it. It became larger after final tightening. That mistake still influences my inspection process.
Build quality also depends on surface preparation. Smooth gel coating, clean mould lines, and stable mounting hardware reduce installation problems. Stainless fasteners help resist corrosion, especially in wet climates. Lightweight carbon-reinforced pieces can look excellent, but poor bonding creates hidden weakness. Inspect the underside, not only the visible surface. Ensure the finished kit does not obstruct lamps, sensors, wheels, or cooling airflow. Check local inspection requirements before installation. Safety should remain practical, even when the design looks aggressive.
How to Choose a Body Kit for Your A3 8P Model
Choosing the best body kit for an A3 8P starts with fitment, not appearance. Check the exact production year, three-door or Sportback body, bumper sensors, and headlamp washers. Facelift and pre-facelift panels often look similar, yet mounting points can differ. Measure twice.
Material affects both installation and daily use. Fiberglass usually costs less, but it may need reshaping around the wheel arch. ABS plastic offers more flexibility for narrow streets and steep ramps. Composite panels can reduce weight, although repair work may become more complicated. SEMA’s 2023 Market Report valued the United States specialty-equipment market at about $52.3 billion in 2022. That figure shows strong demand, but popularity does not guarantee correct fitment.
Ask for panel thickness, mounting hardware, installation instructions, and documented test fitting. A reliable seller should provide these details without vague promises. The U.S. Department of Energy notes that an additional 100 pounds can reduce fuel economy by up to 1 percent. A wide kit, heavy wheels, and extra brackets may affect handling more than expected. Review local rules for bumper height, lighting, pedestrian safety, and wheel coverage before ordering. I once underestimated arch clearance by a few millimeters; the tire rubbed during full steering lock. That mistake changed my view of “perfect” fitment. Choose a kit that matches your driving, repair skills, and inspection requirements, not only your favorite photograph.
Installation, Legal Checks, and Long-Term Maintenance
Choosing a body kit for an 8P hatchback involves more than appearance. Installation quality, legal compliance, and future maintenance matter just as much.
I have seen poorly aligned kits create uneven panel gaps and constant rattling. Measure twice. Test-fit every panel before drilling or bonding. A qualified technician should check mounting points, bumper clearance, wheel movement, and access to lighting components. Use approved fasteners and retain the original crash structure. Never cut structural sections without documented engineering guidance. Fitment is rarely perfect.
Legal requirements differ by country and region. Check rules for vehicle width, ground clearance, exposed wheels, lighting height, pedestrian safety, and exterior projections. Ask the inspection authority before installation, not after. Confirm whether the modification needs registration, certification, or an insurance update. Keep invoices, product specifications, installation photos, and inspection records. This paperwork can prevent expensive disputes later.
Long-term care starts after fitting. Recheck fasteners after the first few drives, then inspect them during routine servicing. Look for stress cracks around mounting holes, paint lifting, water trapped behind panels, and rubbing near the tires. Wash road salt from hidden edges and avoid harsh chemicals on repaired surfaces. Flexible areas may need careful touch-up work. I once underestimated drainage around a lower lip, and repeated moisture caused early corrosion nearby. That mistake was preventable. Seasonal inspections are worth the few extra minutes.